주피터 노트북에 clojupyter 클로저 커널을 설치해서 clojure 개발을 손쉽게 해보자.
1. Clojure 설치
문서 하단으로 이동
2. Jupyter 설치
보통 python 모듈로 설치하는데, brew 로 설치하여 lab 버전을 사용하고자 한다.
1
2
3
4
5
6
7
8
# 쥬피터 설치
brew install jupyter

# 파이썬 커널만 있음
$ jupyter-kernelspec list
Available kernels:
  python3    /opt/homebrew/Cellar/jupyterlab/3.4.5/...
3. clojupyter 커널 설치
소스 다운로드 및 빌드
conda 에서 설치
- conda-forge 에는 0.3.2 버전이 등록되어 있다.
깃허브에서 소스를 다운로드 빌드한 후, jar 파일로 설치하기
- main 브랜치를 빌드하면
v0.3.3버전이 나온다 => maven 리포지토리- Mac M1 사용자는
v0.3.5사용 - 깃허브 - clojupyter - tag:v0.3.5: Upgrade for M1 support
- Mac M1 사용자는
1
2
3
4
5
6
7
8
9
10
11
12
13
14
15
16
17
18
19
20
21
22
23
24
25
26
27
28
29
30
31
32
33
34
35
36
37
38
39
40
41
42
43
44
45
46
47
48
49
50
51
52
53
54
# 싱글브랜치 다운로드
$ git clone --single-branch -b v.0.3.5 https://github.com/clojupyter/clojupyter clojupyter_0.3.5
$ cd clojupyter_0.3.5
$ lein clean
$ lein uberjar
$ ls target
clojupyter-0.3.5-standalone.jar # <== 단독실행 가능버전을 사용해야 함
clojupyter-0.3.5.jar
# jar 파일을 실행하여 버전과 명령어 리스트 확인
# - clj로 실행하거나: clj run -m clojupyter.cmdline list-commands
# - lein 으로 실행하거나
$ lein clojupyter list-commands
If there are a lot of uncached dependencies this might take a while ...
Clojupyter v0.3.5 - List commands # <== v0.3.5 확인
Clojupyter commands:
- help
- install
- list-commands
- list-installs
- list-installs-matching
- remove-installs-matching
- remove-install
- version
...
# 커널 설치 명령 (커널명 = clj-1.11)
$ lein clojupyter install --ident clj-1.11
If there are a lot of uncached dependencies this might take a while ...
Clojupyter v0.3.5 - Install local
Installed jar: ./target/clojupyter-0.3.5-standalone.jar
Install directory: ~/Library/Jupyter/kernels/clj-1.11
Kernel identifier: clj-1.11
Installation successful.
exit(0)
# 커널 등록 상태를 확인하자
$ jupyter-kernelspec list
Available kernels:
python3 /opt/homebrew/Cellar/jupyterlab/3.4.5/libexec...
clj-1.11 $HOME/Library/Jupyter/kernels/clj-1.11
# 이제 사용해보자! (두둥)
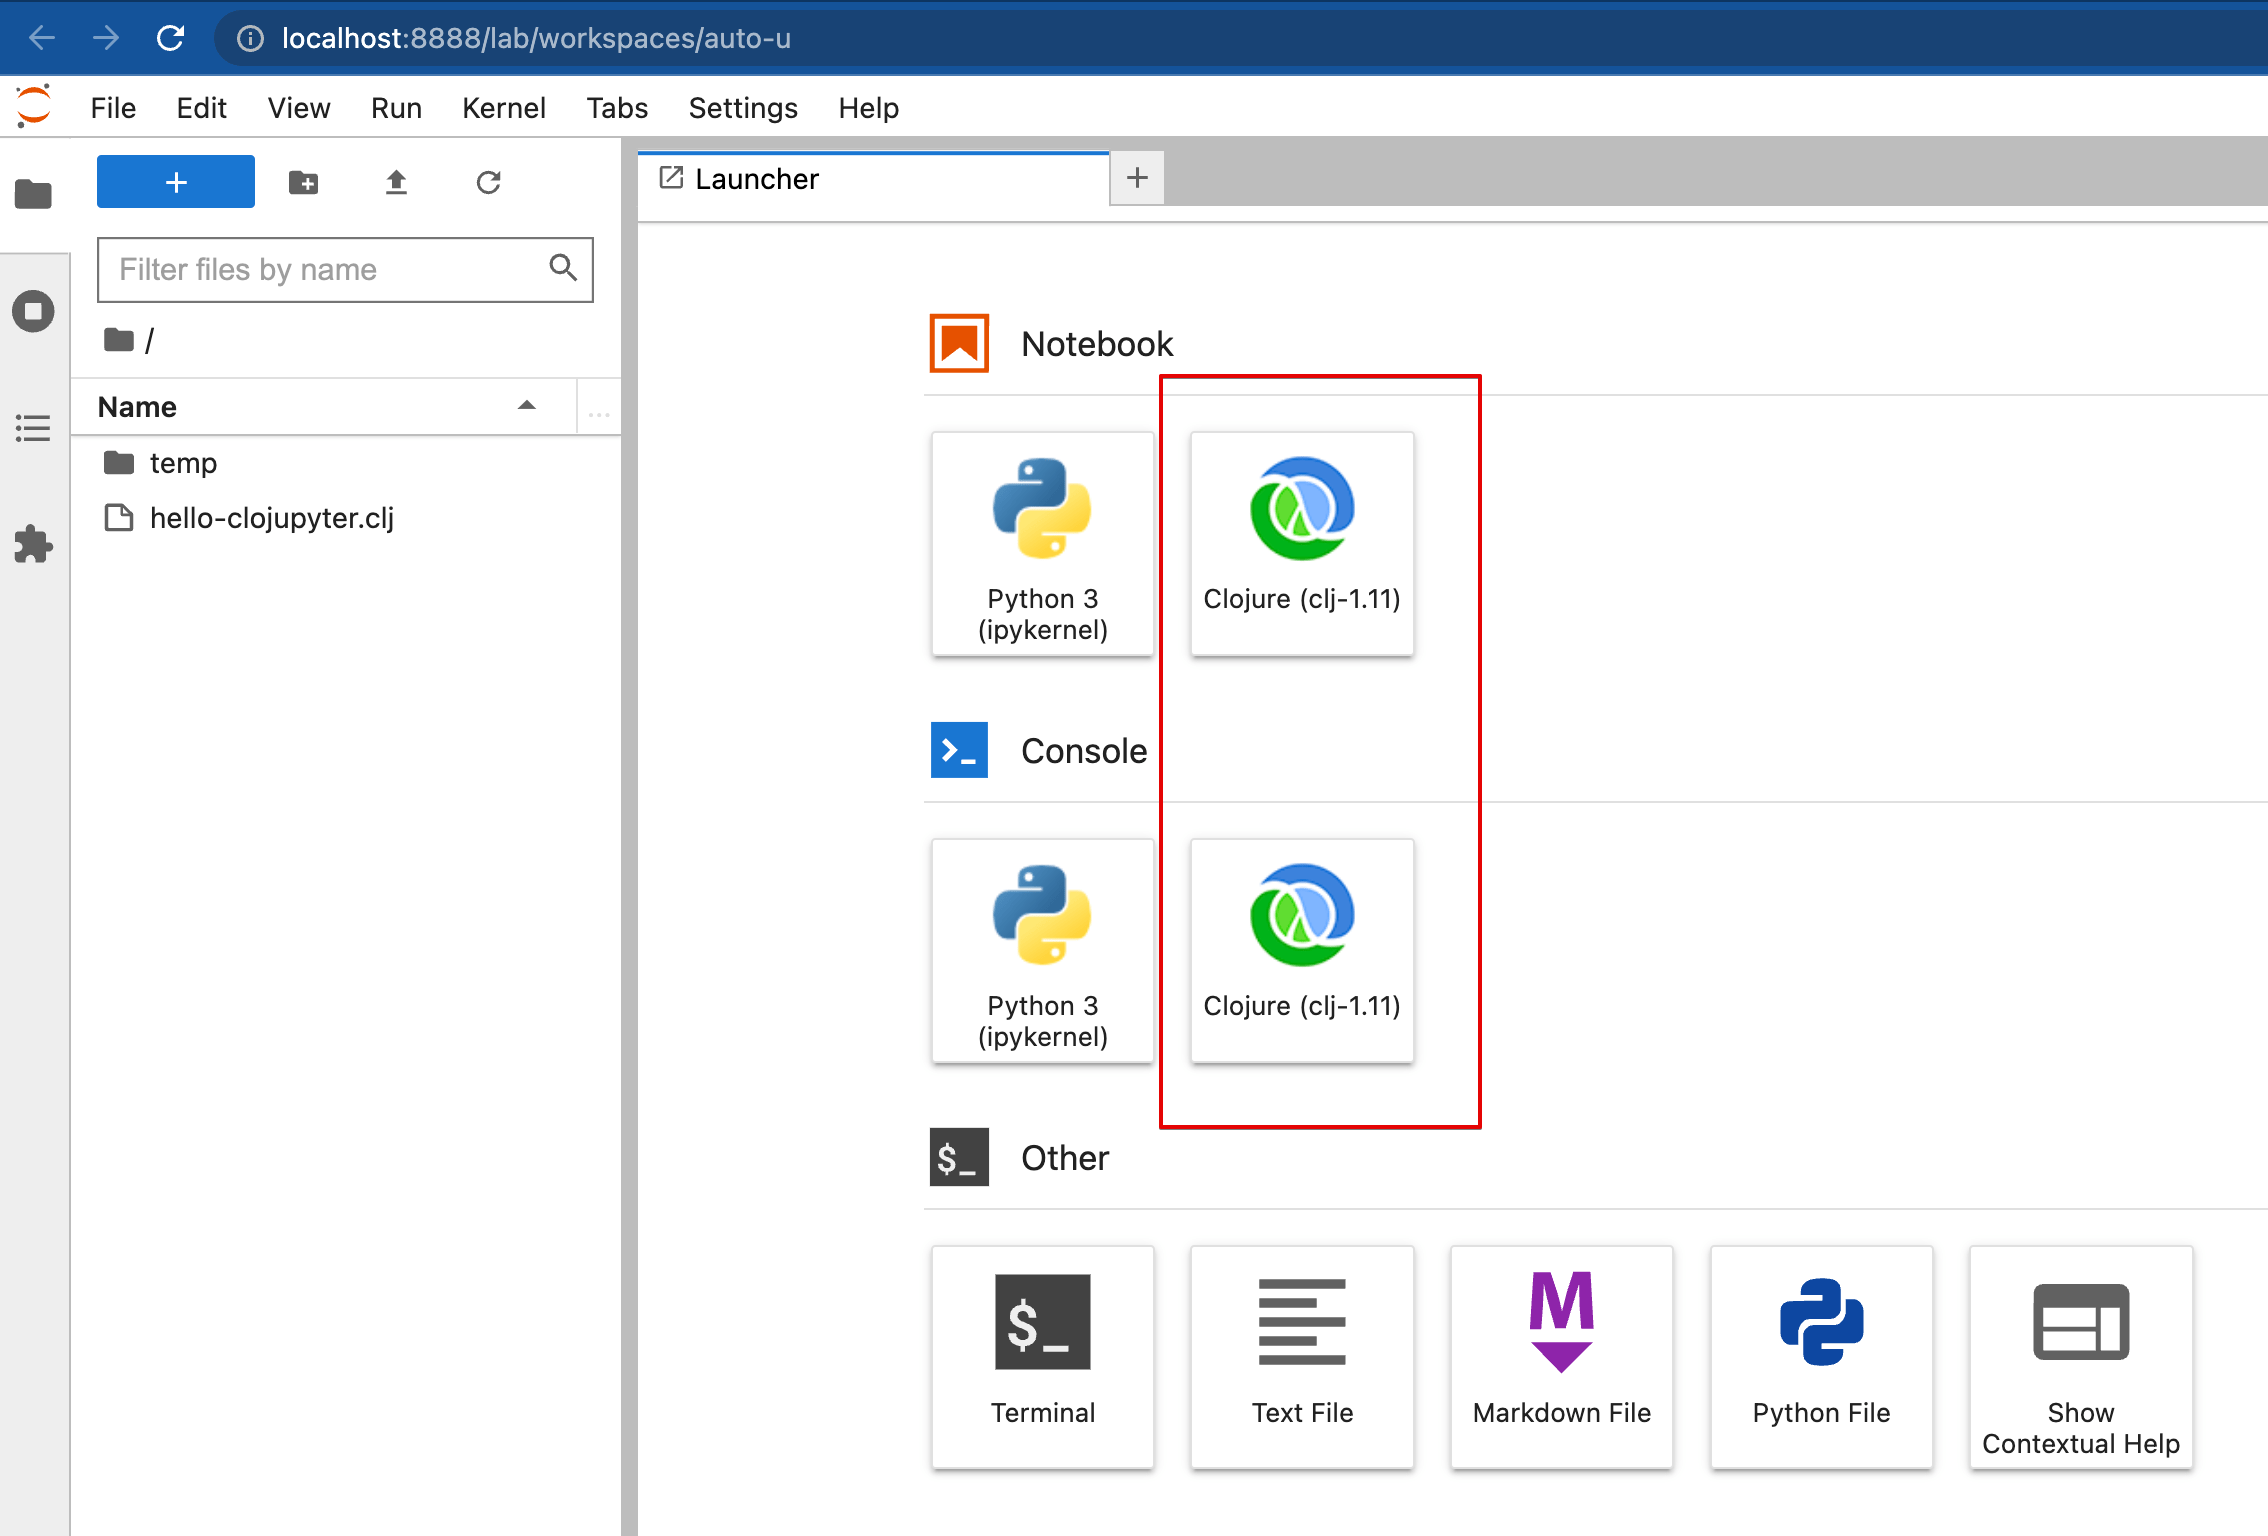
$ jupyter lab
클로저 커널이 나타난 런처 화면
마크다운과 함께 쓰니 편하다
이제 노트 정리와 함께 클로저를 연습해보자.. 즐~
tip. 유용한 jupyter extensions
참고: 설치 도움말
- jupyterlab-git: 깃허브 연결
- jupyterlab-execute-time: 수행시간 표시
클로저(Clojure) 언어
Clojure 설치
- JDK 설치 (LTS 버전: 11 또는 17)
- 버전을 선택해 설치하고 싶으면 Temurin 다운로드를 이용
- Apple intel(x86_64) 과 sillicon(aarch64) 두가지 모두 제공
- AdoptOpenjdk 배포판은 Temurin 배포판으로 유지보수가 변경되었다.
- 귀찮아서
brew를 이용해 최신 JDK를 설치한다면- Cask 채널 등록:
brew tap homebrew/cask - 설치:
brew install temurin
- Cask 채널 등록:
- Clojure CLI 설치
brew install clojure
- Leiningen 설치 (Clojure REPL & Build 도구)
brew install leiningen
참고: lein 으로 무엇을 할 수 있는가? 깃허브 - Basic Usage
1
2
3
4
5
6
7
8
9
10
11
$ lein new [TEMPLATE] NAME # generate a new project skeleton

$ lein test [TESTS] # run the tests in the TESTS namespaces, or all tests

$ lein repl # launch an interactive REPL session

$ lein run -m my.namespace # run the -main function of a namespace

$ lein uberjar # package the project and dependencies as standalone jar

$ lein deploy clojars # publish the project to Clojars as a library
Clojure REPL 사용해 보기
1
2
3
4
5
6
7
8
9
10
11
12
13
14
15
16
17
18
19
$ lein repl
REPL-y 0.5.1, nREPL 0.9.0
Clojure 1.11.1
OpenJDK 64-Bit Server VM 17.0.3+7-LTS
    Docs: (doc function-name-here)
          (find-doc "part-of-name-here")
  Source: (source function-name-here)
 Javadoc: (javadoc java-object-or-class-here)
    Exit: Control+D or (exit) or (quit)
 Results: Stored in vars *1, *2, *3, an exception in *e

user=> (println "hello")
hello
nil    # <= 파이썬으로 치면 None 리턴

user=> (quit)
Bye for now!

$
Clojure project 생성과 빌드해 보기 (jar 파일 생성)
참고문서
- Baeldung - Introduction to Leiningen for Clojure
- 공식문서 - gen-class Examples
- Stackoverflow - 왜 클로저는 파일명의 대시를 언더스코어로 변경하는가?
1
2
3
4
5
6
7
8
9
10
11
12
13
14
15
16
17
18
19
20
21
22
23
24
25
26
27
28
29
30
31
32
33
34
35
36
37
38
39
40
41
42
43
44
45
46
47
48
49
50
51
52
# 새 프로젝트 생성 (app template 선택)
$ lein new app my-project
...

# 생성된 프로젝트로 이동
$ cd my-project

# 프로젝트 템플릿에 따라 파일들이 생성된다
# 프로젝트 정의: project.clj
$ cat my-project/project.clj
(defproject my-project "0.1.0-SNAPSHOT"
  :description "FIXME: write description"
  :url "http://example.com/FIXME"
  :license {:name "EPL-2.0 OR GPL-2.0-or-later WITH Classpath-exception-2.0"
            :url "https://www.eclipse.org/legal/epl-2.0/"}
  :dependencies [[org.clojure/clojure "1.11.1"]]
  :repl-options {:init-ns my-project.core})

# 프로젝트 소스의 main 파일
# (파일명의 '-'가 '_'로 변경됨)
$ cat src/my_project/core.clj
(ns my-project.core)

# main 함수
(defn -main
  "I don't do a whole lot ... yet."   # <== comment
  [& args]
  (name "-main")
  (println "-main Hello, World!"))

(defn foo
  "I don't do a whole lot."
  [x]
  (println x "Hello, World!"))

# 이 상태로도 REPL 이용해 사용해 볼 수 있다.
$ lein repl
...
my-project.core=> (foo "ABC")
ABC Hello, World!
nil
my-project.core=>

# main 함수가 실행됨
$ lein run -m my-project.core
Hello, -main World!

# jar 파일 생성 (./target)
$ lein uberjar
Created my-project/target/my-project-0.1.0-SNAPSHOT.jar
Created my-project/target/my-project-0.1.0-SNAPSHOT-standalone.jar
Leiningen 을 위한 JVM_OPTS 설정
참고: 깃허브 - technomancy/leiningen - Setting JVM Options
- 첫번째 방법은, project.clj 에서
:jvm-opts ["-Xmx1g"]등을 기술하는 것 - 두번째 방법은, 환경변수 JVM_OPTS/LEIN_JVM_OPTS 를 활용하는 것
- 보통 사용하는 java 옵션의 이름은
JAVA_OPTS인데,JVM_OPTS를 쓰고 있다. - 참고: Re: Leiningen 환경변수로 JAVA_OPTS 를 읽어 들이나요?
- 보통 사용하는 java 옵션의 이름은
1
2
3
4
5
# 일반적인 JVM 메모리 설정 (내가 쓰는 설정)
export JAVA_OPTS="-Xms1g -Xmx1g"

# lein 관련 설정은 LEIN_JVM_OPTS 으로 정의하자
export LEIN_JVM_OPTS="-Dmaven.wagon.rto=1800000 -Dclojure.vmargs=\"-d64\""
9. Review
- 이것 외에도 다른 커널들이 있었지만, 최근까지 업데이트 되는 것은 없었다.
- 커널 설치와 커널 동작 방식에 대해 조금 더 이해하게 되었다.
끝! 읽어주셔서 감사합니다.